Tuesday, October 27, 2015

Perspectives on iPads

In this blog post I will be discussing the different perspectives on iPads through three different people: a student, a parent, and a teacher.

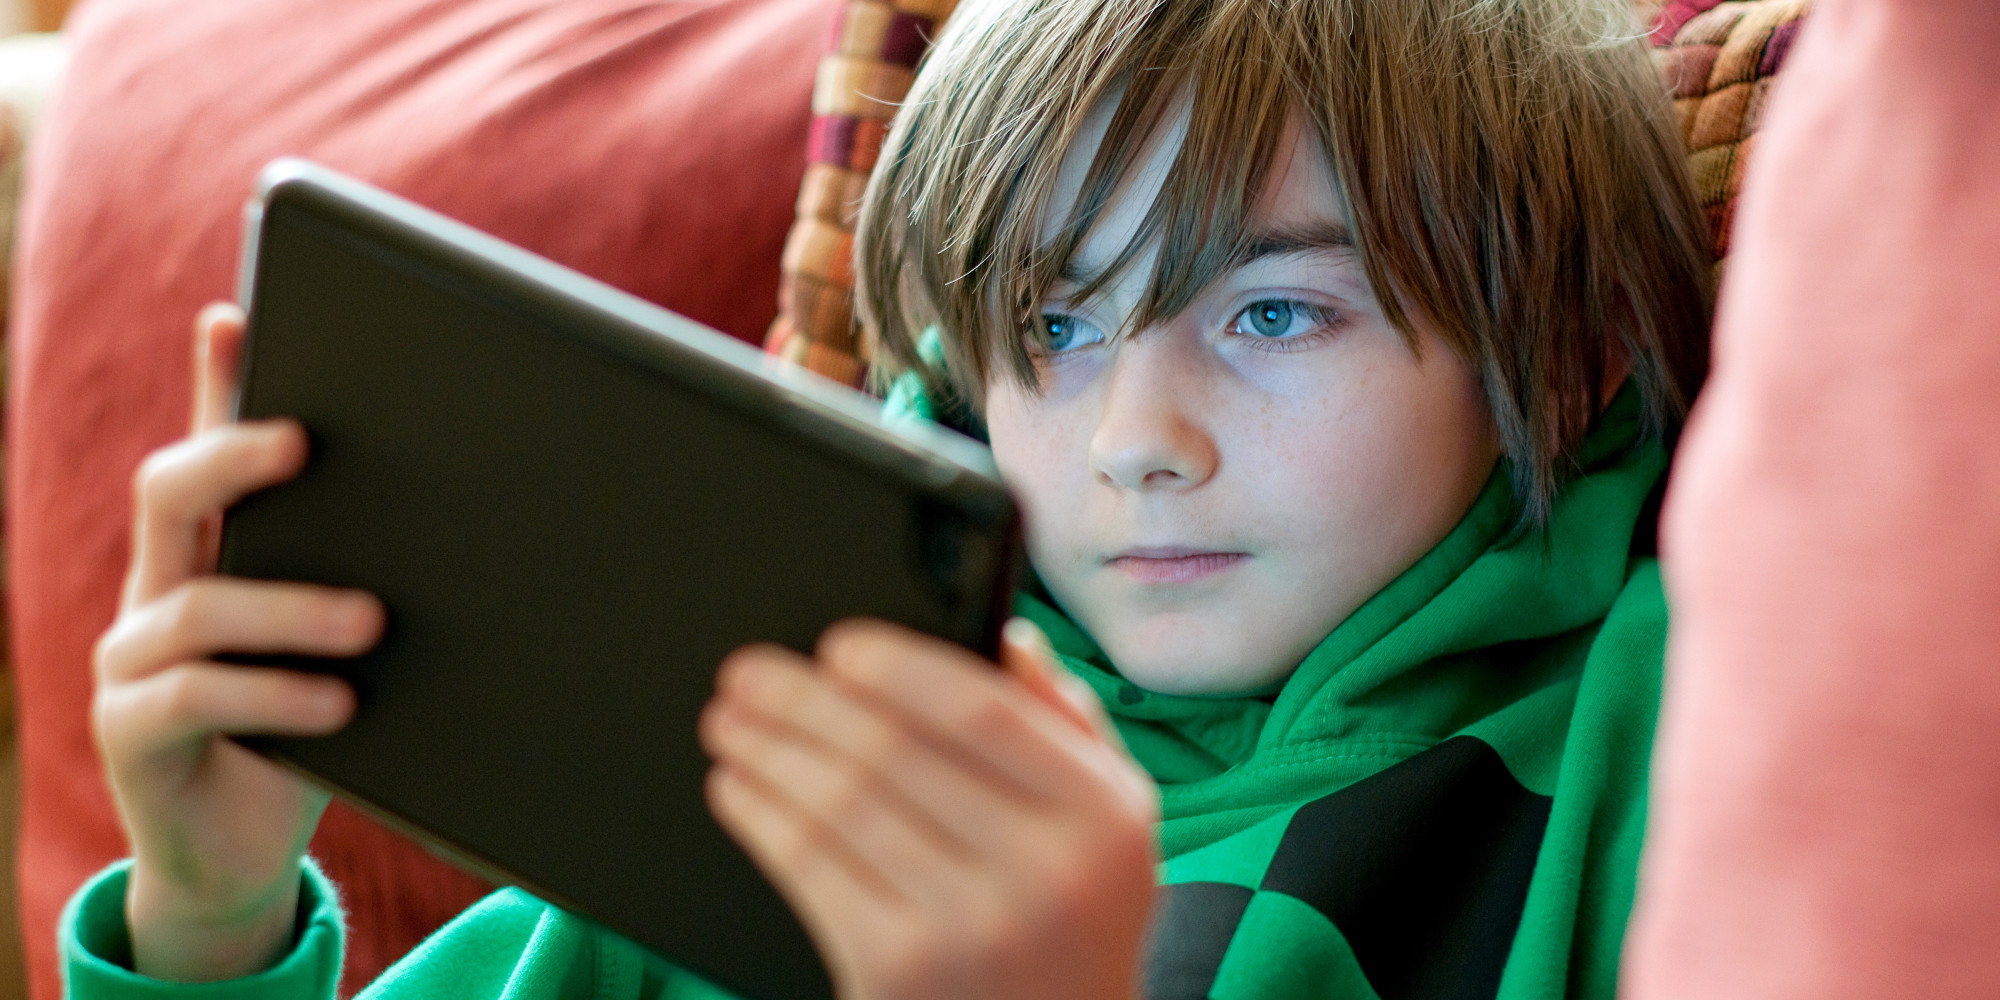
Student's Perspective
It's no surprise that student's LOVE iPads. If you bring out an iPad for a child, you will immediately see their eyes light up. They love using the apps to play all different types of games. Students are able to work independently and make choices on the iPad (and we know how much kids love to make their own choices!). Students love to use iPads in school because it's much more engaging than listening to a lecture!

Parent's Perspective
Parents really enjoy having their kids use iPads because they can see how much their child is learning from the different apps. However, parents are concerned with their children constantly being on the iPad for hours on end. They are also concerned that their children are not using their muscles in their fingers and might have difficulty in school with writing. Overall parents are very optimistic about using iPads and think they engage their children.

In a survey, 2/3 of parents felt that iPads had a positive benefit on their child's learning:

Here is a video of a parent discussing her perspective on iPads: 


Teacher's Perspective
Teacher's think that iPads are great implementation devices for lessons because they get students engaged and motivated! There are so many different apps on the iPad that enhance learning for students. Teachers like that students can practice different skills on the iPad and have seen great progress when students use the device. Teachers have commented that iPads can sometimes become distracting, since some students try to play around on the iPad. It's important for teacher's to be monitoring students while they are on the iPad to keep them on track. 


How do you feel about iPads? Which perspective do you agree with the most? 


(References: https://tech.svvsd.org/ltp/2014/08/01/ipads-and-learning-a-parent-perspective/)

iPad Apps for Autistic and Nonverbal Children


In this YouTube video, Lauren Meatty discusses how effective iPads apps are for autistic and nonverbal children. She talks about how she worked with a little girl with cerebral palsy and the iPad opened a huge door for her! She was able to use her finger to play on the piano app on the iPad. Meatty talks about other apps that are also great for individuals with cerebral palsy because they only require one finger touch. She also shows some great communication apps that would be great for autistic students who are nonverbal. These apps allow individuals to go out in the real world and communicate with society without even saying a word! Meatty concludes the presentation by saying in addition to using the iPads for curriculum, she also uses iPads for motivations and rewards. I really enjoyed this video because it gave me more perspective on how effective iPads are in the classroom. I was not aware of a lot of these apps available on the iPads, I will definitely use these in my classroom. It's amazing how much capability iPads have for autistic and nonverbal children! I feel as though I would be comfortable integrating the use of iPads in the classroom because I personally have one. I think iPads are great and have so much to offer for all types of learners!

Electronic Touch Tablet

Electronic touch tablets are an alternative from laptop computers. They are capable of doing the same things a laptop would do but they are smaller and light weight. Instead of using a keyboard and mouse, you simply use your finger to type and navigate the tablet. There are SO many different types of apps you can download to use on the device. Students use tablets in so many different ways! Students can use the tablet to research information, use an app for reading, or play a game to enhance math skills. Electronic touch tablets are really great for any learner but have proven to be especially useful for students with autism or ADHD.

Here is a video of a student using an iPad to practice counting money. You can see how engaging the app is and how effective it is in helping the student practice math skills!


Type to Learn Software to Teach Keyboarding Skills

Type to learn software is used to help students develop their keyboarding skills. This type of program has various games to learn where the keys are and which fingers should be used to tap them. There are diagnostic assessments to see where students strengths and needs are. Accuracy as well as speed are key parts in the program. These programs are a lot of fun while simultaneously teaching keyboarding skills. All students can benefit from this program to enhance their keyboarding skills!

Here is a demonstration on Type to Learn 4 (a keyboarding software!):

Voice Output Communication Device


Voice output communication devices are used for individuals that are nonverbal. These devices allow the individual to communicate by simply pressing buttons which will convey one or more messages. The messages on the device are recorded specifically for that child, so that they are relevant to the child's needs and environment. This site has 9 really great strategies to consider when using voice output devices, it's important for teachers to be aware of these considerations to make sure the student feels comfortable using their device. (http://www.sfsu.edu/~cadbs/30VoiceOutput.pdf)

Assisted Literacy Software

 
Assisted literacy software helps students develop literacy skills. This type of software is perfect for students that need help with phonemic awareness, decoding, comprehension, and overall reading fluency. This software is usually associated with a disability like dyslexia, however it's great for anyone that is struggling with reading.

Portable Word Processor

A portable word processor is an alternative to using a laptop for writing. It is lightweight which is great when a student has to move from class to class throughout the school day. The text is usually auto-saved which can be revised later. The text on the word processor can be transferred onto the computer through any word processing program. Portable word processors also come with a built-in spell check! Students with writing difficulties, have poor handwriting skills, ADHD, and those who can't hold a pencil would greatly benefit from this device!

Adapted Keyboard

Adapted keyboards are differentiated keyboards to meet the needs of the student. Adapted keyboards come in so many different styles, sizes, and colors. There are also an array of different types of keyboards that serve different purposes. Students can even have keyboards designed specifically for their diverse needs! Overlays can be customized for the student to form questions, write sentences, and perform different functions on the computer.


Here is a student using her adapted keyboard! Look how amazing it is for her to be able to type and communicate!


Multisensory Educational Software (MATH)

Multisensory educational software is a curriculum that adapts multisensory methods into lessons. There are so many different programs out there that have different multisensory components. Some of the programs I saw focused more on hands on learning with many manipulatives. Others had auditory/visual components and kinesthetic activities to teach math skills. To see which program your students would benefit from, I suggest for you to first research all the different programs out there! Students that would benefit from this type of software are individuals with math dyslexia, ADHD, learning disabilities, kinesthetic learners, visual learners and auditory learners!

Books on CD

Books on CD's are similar to scan and read software in the sense that the material is being read to the user. However, books on CD's do not have all the features that scan and read softwares have. Books on CD's is simply an audio of a person reading the book. Books on CD's are simple and great for about anyone! While listening to the CD, you can read along with the text in the book. Individuals with disabilities that really benefit from books on CD's are those who are blind, visually impaired, dyslexic, and learning disabled.

Scan and Read Software


Scan and read software is when papers are scanned onto the computer which then is able to be read. This is a great assistive technology option for students who have visual impairments or who are blind. Also individuals with dyslexia, learning difficulties, or physical impairments can also benefit from this type of software! The software is great because it has text-to-speech capabilities, highlighting, bookmarking, text notes, and a dictionary!

Thursday, October 22, 2015

Naturally Speaking Voice Recognition Software

Naturally speaking voice recognition allows the user to speak into the computer and the software can dictate what the user is saying and write it out in a document. Students wear a headset with a microphone so that they can speak what they want written on the screen. The software is able to delete words and add punctuation when the user tells the computer. This software would be great for a student who has low fine motor skills, since they would not need to type!

Talking Word Processor Software


Talking word processors (TWP) are writing software programs that provide speech feedback as the student writes, echoing each letter as it is typed and each word as the spacebar is pressed. Students with learning disabilities find that having written material read aloud assists them to better edit, comprehend and organize. TWP programs offer other adjustments such as enlarging the size of the text and changing the color of the foreground, background and highlighting box to follow along the text being read. TWPs offer the ability to select from a variety of different voices, as well as adjust the rate and volume of the speech. Some other features are spell check, highlighting rates, or word prediction.

Word Prediction Software


Word prediction software helps users during word processing by predicting a word intended to type. Predictions are based on spelling, syntax, and frequent/recently used words.The user types the first letter of a word, and the program offers a list of words beginning with that letter. After the user chooses a word, the computer predicts the next word in the sentence even before a letter is typed! This program helps students who struggle with writing.

Here is a tutorial on how a word prediction software works. In the video, Brian talks about a program called eType which is free!

Module

After completing the module, AT for School Age, I have learned even more about assistive technology! The first part of the module focused on the AT assessment process in the school environment. From this section I learned that the assessment must be completed by a team. The assessment process takes time and requires an evaluation of the student's needs, strengths and preferences, the environment the AT will be used in and the tasks that the student needs to accomplish. The second part focused on the AT considerations in the IEP process. The IEP team is required to consider the AT needs of every student who is receiving special education services. During the IEP meeting, the team identifies the current accommodations or AT that been tried and if unsuccessful, the team identifies potential solutions. The last section discussed automatic speech recognition (ASR). ASR is beneficial for both students with physical and learning disabilities. ASR with dictation can offer typing speed upwards of 120 words per minute! The only downside to ASR is that transferring spoken words to coherent writing is complicated. I think this module was great because I learned new ideas about AT that I didn't know previously. From learning more about the AT assessment process and the considerations in the IEP process, I feel that I could go into an IEP meeting confidently with this new knowledge!

Here's the link! (http://www.atinternetmodules.org/mod_list.php)

Thursday, October 15, 2015

Assistive Technology for Computer Access

The assistive technology continuum begins with low tech, progressing to mid-tech and then to high-tech devices (if the student's need were unmet). The most appropriate device must be decided through evaluation and actual usage.
 
An example of assistive technology would be a keyboard. There are students out there that have difficulty using a standard computer keyboard. Luckily, there are a lot of different keyboards out there that are accessible to meet the needs of all students! Some of these keyboards are an expanded keyboard, mini-keyboard, and a customizable keyboard.

-Expanded keyboard is an enlarged or oversized keyboard, they are beneficial for students with poor fine motor control.
-Mini-keyboard is smaller than the standard keyboard. This type of keyboard benefits students with motor impairments (muscular dystrophy and spinal muscular atrophy) that 1.) restrict their range of motion 2.) have a good accuracy within a narrow range of motion.
-Customizable keyboard is configured to meet the students' individual needs. Able to meet the needs of a number of students since it has a broad range of customize features that can be changed for each individual student.  

Operating System Features for Users with Disabilities

On my last post I talked about the universal design features found on computers. There are also some features that are geared solely toward individuals with specific disabilities. 
Here are some additional operating system features for users with disabilities:


  • StickyKeys - Allows students to press keys sequentially to execute functions that typically require pressing the keys simultaneously. 
    • Student Characteristics: Cerebral palsy

  • SlowKeys - Increases the amount of time a key must be depressed before registering a keystroke so that brief keystrokes will be ignored. 
    • Student Characteristics: Hand tremors, muscle weakness or fatigue, and poor fine or gross motor control. 

  • MouseKeys - Allows users to direct the mouse pointer and execute all mouse functions using the keyboards numeric keypad.
    • Student Characteristics: Physical disabilities

  • Visual Signals - Instead of a beep to alert users of events, there will be a flashing caption bar.
    • Student Characteristics: Hard of hearing and deafness 

  • High-Contrast Color Scheme - Black background with white lettering
    • Student Characteristics: Visual impairments or blindness 

  • Screen Magnification - Enlarges the image on the monitor, to make the computer more accessible for users with low vision.
    • Student Characteristics:  Visual impairments or blindness

  • Enlarge the mouse pointer
    • Student Characteristics: Visual impairments or blindness

  • Voiced feedback -  Can read everything on the screen: menu bars and menu items, icons and dialog boxes, as well as text. 
    • Student Characteristics: Visual impairments or blindness

Universal Design Features on Computers

Computers are capable of doing some amazing things....and some of these things are features that help students with disabilities! Both Apple and Microsoft companies have a variety of special features in their operating systems to accommodate for all people. Universal design is a broad spectrum that allows accessibility to all people, with or without disabilities, computers have universal features that all people can benefit from! 

Here is a list of the universal design features on computers:

1.
Flexibility-in-Use Guideline: Provide choice in method of use
Operating System Features: Control computer with mouse or keyboard; receive information by reading (monitor) or listening (text-to-speech)
Student Characteristics: Keyboard use supports students who have - poor fine motor control, limited range of motion, difficulty in visually tracking mouse pointer

2. 
Flexibility-in-Use Guideline: Accommodate left & right handed users
Operating System Features: One-button mouse; functions of the two-button mouse can be switched
Student Characteristics: Able to use only one hand or has better control with one hand

3.
Flexibility-in-Use Guideline: Take into account variations in precision and accuracy of mouse use
Operating System Features: Enlarged icons
Student Characteristics: Low vision, visual perceptual issues, hand-eye coordination problems, hand tremors, poor fine motor control, cognitive deficits

4.
Flexibility-in-Use Guideline: Adaptability to user's pace
Operating System Features: Set speed of mouse travel, set timing for double-click, set keyboard repeat delay, set keyboard repeat speed
Student Characteristics: Increase mouse speed for students with limited range of motion; decrease mouse speed for students with visual tracking difficulty, poor fine motor control, difficulty raising head to monitor the movement of the mouse pointer; increase repeat delay for students with poor fine motor control and difficulty raising head to check for typing accuracy

Students Who Are Hard of Hearing


Some of the obstacles students who are hard of hearing face are difficulty following lectures, speech impairments, and a disadvantage during social interactions. However with the help of personal hearing aids and their skills in lip reading, they are capable of understanding speech! Most individuals who are hard of hearing have a hearing assistive technology device to help them hear. Hearing assistive technology systems (HATS) are devices that help individuals function during communication situations. HATS can be used with or without hearing aids or cochlear implants.


Here is a list of the different types of HATS and how they help:


  • FM system - Teacher wears a wireless microphone clipped to his or her lapel or blouse and a small transmitter worn on a belt or waistband. The student wears a small receiver - usually headphones or a direct connection to his or her hearing aid. When the teacher speaks, an auditory signal is broadcasted to the student.
    • Advantages: Student can sit and face anywhere within the system's range, can be used inside or outside
    • Disadvantages: The sound broadcast may carry through walls, possible electrical interference
  • Infrared system - Is very similar to a FM system (microphone, transmitter, and receiver) but they use infrared light waved for transmission. There is minimal distortion and internal amplifier noise in its signal so the sound quality can be superior to a FM system. 
    • Advantages: Privacy is protected because the broadcast signal is secure within the room, sound quality better than FM systems
    • Disadvantages:  Must be a direct line of sight between teacher and student, teacher is limited to movement, not effective in direct sunlight
  • Induction loop system - Uses electromagnetic waves for transmission and works directly with hearing aids. A wire is looped around the perimeter of space such as a classroom or school auditorium. Sounds are picked up by the teacher's microphone, amplified, and sent through the loop. A telecoil (called a T-switch) in the student's hearing aid serves as a receiver. 
    • Advantages: Can be used by anyone with a hearing aid without requiring another piece of equipment for the listener
    • Disadvantages: Requires permanent installation, possible electromagnetic interference
  • Soundfield amplification system- Broadcasts the teacher's voice through loudspeakers that are mounted on the walls or ceiling. A speaker can also be placed directly next to a student.
    • Advantages: Serves the entire classroom; all students benefit
    • Disadvantages: Helpful only for mild or moderate hearing loss 

Thursday, October 8, 2015

Five Amazing Sites for UDL!

1. UDL Goalbook Toolkit (https://goalbookapp.com/toolkit/strategies)

This website is great because it shows you so many different examples for each different strategy in UDL! This is great for teachers because it gives real examples that you can implement in your classroom to reach the needs for all learners. The picture I provided below is just a snapshot of the examples this site provides for each UDL guideline. Make sure to click on the website to see just how many examples they have!


2.  Universal Design for Learning - Elements of Good Teaching (http://ada.osu.edu/resources/fastfacts/Universal-Design-FF.pdf)

I really like this site because it goes into depth about common teaching methods. The site discusses the strengths, limitations, and preparation that goes into these methods. For examples:

Lecture ---> Strength: class size is not an issue ---> Limitations: little student participation ---> Preparation: information to be learned needs to be clearly indicated.


I like that it brings down all the different types of teaching methods so you are able to see which method will benefit your students. The site also discusses how to implement strategies that will benefit students. One example it says is to put course content online allowing students to "pick-up" material that might have been missed in lecture.


3. Guided Notes (http://ada.osu.edu/resources/fastfacts/Guided-Notes-Fact-Sheet.pdf)

This site goes into detail about the pros of using guided notes. Guided notes are instructor-prepared handouts that provide all students with background information and standard cues with specific spaces to write key facts, concepts, and/or relationships during lectures. Having guided notes increases students' active engagement with course content since they need to be listening to fill in their sheets. Guided notes are also organizers for students to be able to write down their information and review the topics prior to attending class. In the video below you can see an example of guided notes and see how it can be beneficial for students to fill in terminology during lectures to enhance their listening skills!


4. UDL Guidelines (http://www.udlcenter.org/aboutudl/udlguidelines)

 I have talked about UDL Guidelines in my pre/post assessment blog. The UDL guidelines gives you a framework for how your lessons should be when incorporating UDL. It provides examples for each area so it's easier to see how you can implement new ideas into lessons. Having actual real examples is amazing because sometimes it can be hard to think of ideas especially when you're so busy with the million other things you need to do!


5. CAST.org


I have already talked about CAST in a previous blog but felt like it's such a great resource that I should share it with you again! This site has so much information regarded UDL and can help all educators understand and implement into their lessons. If you haven't read my blog post about "CAST", you should!

Are You Using UDL in Your Lessons?

A good way to see if you incorporate UDL components in your lesson plan is to take your lesson and look through the UDL guidelines. This is exactly what we did for a course assignment. I found that doing this is very beneficial because you are able to see if you have used UDL components in your previous teaching. I found that I did use many different techniques that are considered UDL, however I noticed that I could definitely enhance my lessons to meet the needs of all learners! For my preassessment, my strongest areas were providing multiple means of representation and multiple means for action and expression. I had the students use graphic organizers, pictures, their text book and watch a film clip throughout the lesson which allowed for multiple means of representation. For multiple means of action and expression I had the students writing down their ideas, finding pictures, working in groups, and sharing their posters. For providing multiple means for engagement, students will creating an ecosystem about their own lives.


I noticed that I did not have many areas for providing multiple means for engagement. For my post assessment I decided to focus on enhancing that area as well as some of the gaps in the others. In the multiple means of representation section I decided to have pictures that correlate with the vocabulary words on the board. Students will review the vocabulary words to better understand them. Students will also be provided with a checklist for the steps they need to complete during the lesson. For the multiple means of action and expression section, students will use computers to find more information. In the multiple means of engagement section, I added the opportunity for students to have choice for how they want their posters to look and the choice to gather their pictures from the internet or magazines. Students will also be provided with a rubric prior to the lesson that shows the ultimate goals. This rubric will be given back to the students the next day that shows their feedback to their work.
These UDL guidelines are great because you can go through the list to see if you have met the areas for Universal Design. I will definitely be using this outline for lesson plans to make sure that I am incorporating UDL!

You can view the website which goes in depth and shows examples for each section:
(https://sites.google.com/site/udlguidelinesexamples/ )